


How I Learned to Take Down the Bug Horde in HELLDIVERS 2
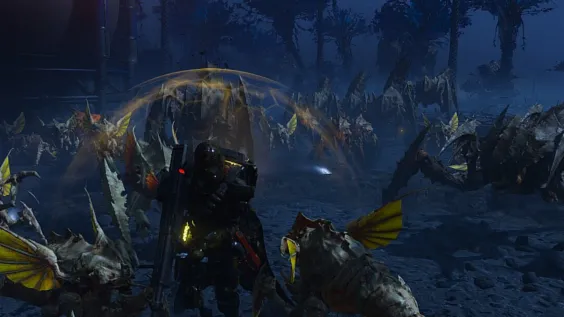
As an experienced HELLDIVERS operative, I’ve learned that choosing the right gear is absolutely critical when facing off against the Zerg’s terrifying creatures. These monstrous enemies come in five main categories, each posing unique challenges that demand strategic thinking and the proper tools for the job.
First, we have the Super Heavy cla*s, which includes the infamous Titans. These behemoths only show up at difficulty level 6 or higher, and they’re no joke. With their heavy armor, slower movement speed, and devastating long-range attacks that can instantly obliterate careless players, Titans require a carefully planned approach.
Next up are the Heavy enemies, like the dreaded Assault Bugs. These tough customers start appearing at difficulty level 4, and they’re known for their heavy armor and surprisingly fast movement speed. Trust me, you don’t want to be caught off-guard by these critters.
The Ranged category includes the Yellow and Green Bile Spitters. These nasty buggers are part of a random pool of monsters, so you never know if a mission will be crawling with them or completely devoid of their presence. With their medium armor, slower movement, and deadly long-range attacks, Bile Spitters demands a cautious approach.
Assault enemies, like Stalkers and Trackers, are another random addition to missions. These light-armored, fast-moving menaces can quickly close the distance with their jumping abilities, and their tongue attacks can slow you down or knock you back. Keeping your distance is key.
Finally, we have the Cannon Fodder cla*s, which includes Carrion Bugs, Warrior Bugs, and Zerg Commanders. While they might not be as individually threatening as the other categories, these light to medium-armored enemies can quickly overwhelm you with their sheer numbers.
How to Deal with Super Heavy Enemies (Acid-Spitting Titans)
When it comes to taking down Titans, I highly recommend S-Rank weapons like the Javelin (one headshot or three body shots), Railgun (one headshot after acid spit or one headshot plus one body shot), Falcon 110mm Rocket Nest (2-3 shots), and Falcon 500kg Bomb (one center shot).
A-Rank options include the Railgun Attack, which can severely damage Titans but not kill them outright, and has a hefty 3-minute cooldown.
B-Rank choices like the Railgun Laser, Railgun Mobile Firepower Network, and 380mm Mobile Firepower Network can be hit-or-miss and have long cooldowns, so use them cautiously.
What Works Best Against Heavy Enemies (Assault Bugs)
For Assault Bugs, I swear by S-Rank weapons like the Railgun in safe mode. Two shots break their armor, and four shots finish the job. Alternatively, break their armor with two shots and switch to your main or secondary weapon to hit the exposed yellow weak spot.
A-Rank picks include the Javelin (three body shots or one headshot), Recoilless Rifle, and Disposable Anti-Tank Weapons. Just be careful with the slower bullet speeds and close-range aiming issues. The Railgun Attack is also a solid choice, especially at lower difficulties or when paired with a Javelin.
B-Rank options like the Machine Gun and Grenade Launcher can work, but they require precise aiming and have their drawbacks.
How to Tackle Ranged Enemies (Yellow and Green Bile Spitters)
When dealing with Bile Spitters, S-Rank weapons like the Grenade Launcher are my go-to. Its area damage and fast rate of fire make short work of these pests, but keep an eye on your ammo.
A-Rank choices include the Machine Gun, Machine Cannon, Anti-Material Rifle, Falcon Cluster Bomb, and Railgun. These weapons can take down Bile Spitters quickly, especially with headshots.
The B-Rank Falcon Machine Gun Strafe is a decent option for nearby enemies, with its short delay and the ability to use it continuously 4 times.
What to Use Against Assault Enemies (Stalkers and Trackers)
For Stalkers and Trackers, I can’t recommend the S-Rank Shield Generator Backpack enough. Its shield thickness is equivalent to your health, and it makes you immune to slowing and knocking back from tongue attacks as long as the shield is active. Just watch out for surprise attacks from 3 Trackers, which can break your shield.
The A-Rank Guardian Dog Roaming Vehicle is another great option, with its laser weapon drone that clears jumpers 24/7 in a 360-degree range.
The B-Rank Guardian Dog is a projectile weapon drone that consumes ammo and deals slightly higher damage than the Guardian Dog Roaming Vehicle. However, its ammo depletes quickly and can only be replenished by picking up supplies, not ammo boxes. If you can manage without needing supplies, the Guardian Dog becomes an S-Rank choice.
How to Handle Cannon Fodder Enemies (Carrion Bugs, Warrior Bugs, Zerg Commanders)
When it comes to dealing with the Cannon Fodder cla*s, I always turn to S-Rank weapons like the Falcon Cluster Bomb, which offers a large area of effect and can be used continuously 5 times with a short delay. The Grenade Launcher is another top pick, with its area damage and fast rate of fire, but keep an eye on your ammo. The Guardian Dog Roaming Vehicle’s laser drone is also a lifesaver, clearing bugs 24/7 in a 360-degree range.
A-Rank options include the Falcon Machine Gun Strafe, which quickly clears nearby bug swarms and can be used continuously 4 times with a very short delay. The Flamethrower is another solid choice, igniting the ground for large areas of continuous damage, although it can be slow when clearing Zerg Commanders.
Other A-Rank weapons like the Machine Gun, Machine Cannon, Mortar, and Guardian Dog have their strengths and weaknesses. The Machine Gun offers high damage with a small area explosion and a fast rate of fire but suffers from high recoil and frequent reloading. The Machine Cannon penetrates medium armor and has an extremely fast rate of fire. The Mortar is an S-Rank pick for retaliation missions, with its extremely high ammo capacity, long range, and ability to clear light and medium armor quickly, but it struggles with close-range enemies. The Guardian Dog’s projectile weapon drone deals slightly higher damage than the Guardian Dog Roaming Vehicle and becomes an S-Rank choice if you don’t need supplies.
Lastly, the B-Rank Ally has an extremely fast rate of fire and a high magazine capacity of 250 rounds, but it can’t penetrate medium armor.
Remember, choosing the right gear is only half the battle. It’s up to you to master these weapons and develop strategies that work best for your playstyle and the challenges at hand. With the right equipment and a bit of practice, you’ll be ready to take on anything the Zerg throws your way. Stay alert, stay alive, and most importantly, keep fighting for Super Earth!


