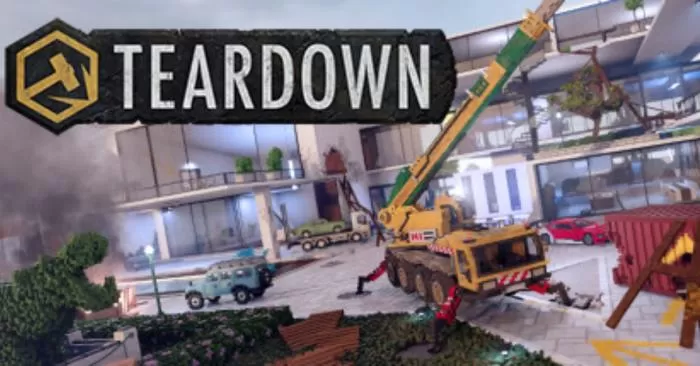
This guide will attempt to help veterans and beginners alike get into the world of custom heists and challenge modes on custom Teardown maps.
This may be confusing for newer Modders and if you run into any issues the guide isn’t very good at explaining or is missing outright. Please contact me on discord (Tony Stark#5913) for more personal help. Or consider checking out the official Teardown Discord (https://discord.gg/teardown) – [] Where i am usually active and am always willing to help!
Disclaimer:
This guide is written with the idea that you may already have a map prepared to turn into a heist or challenge variant, i wont be teaching you how to make a map here. Just how to make objectives, heists and challenge gamemodes on the map. Plus, it also should mean you know how to use the editor, i won’t be explaining how to use the editor here as i do that in my vehicle guide, you can read that portion if you don’t know the editor yet.
Part 1: Sandbox Mode
Probably the easiest mode to implement into a map considering its the basic map that a map standardizes to. Doesn’t mean i shouldn’t add it.
After all, things can get deleted. So, sandbox mode will allow players to have infinite ammo for all their guns and no threat of failing a mission.
Adding sandbox mode to your map is as simple as going to the editor, adding a new script and making it the “Sandbox.lua” Script. The map will now act like a sandbox map, however, if you’ve got heist mechanics still active i recommend adding them into a layer (More on that later) and disabling them while sandbox is active.
You can also add sandbox mode to its own layer if you’d like to make it activate through a menu where players will select their preferred gamemode.
You can make a layer by adding everything the gametype contains (scripts, props, objectives) into a single group. Then right clicking the group, going to “Apply Properties” and typing “layer” into the top box, then typing the name of the layer in the bottom box, NO SPACES. This will place sandbox into a layer.
You can now find it in the layers window accesible at the top by going to Windows > Layers.
Part 2: Heist Mode
Heist mode, the meat and bones of any good Teardown mission. Players are tasked with collecting / completing certain objectives either within a timer or not.
Heist mode can be enabled by adding the “heist.lua”script to your map which will enable the fire alarm, and proper mechanics for collecting objectives and triggering alarms.
The heist script comes with 4 parameters that can be tweaked ingame using the param keyvalues in the edit tab when clicking on a script.
This includes
- Timelimit, which can enabled by adding“timelimit=ANY NUMBER”.Where you would replace “any number” with, any number.
- Required, which is done by typing “required=ANY NUMBER” this is the amount of objectives required to beat the mission. useful is you want all the objectives to be optional so players can plan out their route but still need 4 needed objectives, similar to Car Wash or Fine Arts.
- Music, here is where you specifiy the track that plays before the alarm goes off, you do this by adding “music=marina.ogg” Here, you’d replace marina.ogg with any of the songs in “Teardown/Data/Music” If you want to use custom music, place the OGG file into a folder in your mod directory and point it to the file.
- FireAlarm will decide whether there is a fire alarm or not, you can do this with “firealarm=false” you can do either true or false.
Now that we’ve set up our heist script, lets get into alarms and objectives.
Alarmbox
Here you will learn how to make an alarmbox, that will trigger upon snatching an objective.
First step is to place the script, add the script “alarmbox.lua”.
With that out of the way we now want the alarmbox Vox model, parent a vox model to the script that will be the alarmbox, I’ll be using the alarmbox.vox model from my Mega Model Pack.
Now, just tag the vox model with “alarmbox”
Now parent a rope to the alarm box model. This will serve as a tether between the objective and the alarmbox, if you do not have an objective yet. Just leave it unconnected.
And finally, add a light that will flash off and on. Parent it to the vox model.

Simple Objective
This is a simple objective you can just grab and go, no fuss about it.
To achieve an objective like this, you first must add a body.
All the configuration of the objective goes into this body, since the vox model we parent to the body is all just vanity.
You must first add “target” to the tags for the body, this lets the game know its an objective.
Next, we add “nocull” to prevent the objective from fading in and out, and finally, we add “unbreakable” so players cannot destroy the objective. Optionally, you can also make the objective, well, optional. By simply adding the “optional” tag

Make sure the body is dynamic now. This lets players interact with it and move it around.
Now we will add a description for the objective the play can see on the minimap and when hovering over it. You can do this by typing the description into the “desc” value box, you must however follow specific guidelines. it goes by a style of HoverName;MinimapName;Desc HoverName is the name that shows up when hovering over the objective, Minimapname is what shows up on the minimap, and Desc is the actual description.
An example of an objective description would be “Cutting Saw; Outside; A cutting saw used to grind metal girders, is located just near the base of crane.”
Note: You must seperate all 3 of the titles using a semicolon!

Dump In Water Objective
This ones super easy to do, and you can easily convert any simple objective into this type.
You first must add the script, you can use either “carpool.lua” or “dumpinwater.lua”i can’t really find any difference between them, but i would personally say use “dumpinwater”
Now, if you’ve still got your objective from before, simply just Cut it, and Ctrl Shift Paste it on the script, this will paste it in the exact same spot as before and also parent it to the script. The last step is to change “target” to “target=custom” in the body tags.

If you’d like to have a vehicle objective be dumped, you instead parent the car to the script, and then in the vehicle’s body object you add target=custom
DO NOT PUT A VEHICLE INSIDE A BODY, THIS WILL NOT WORK.
Demolition Objective
Very under-utilized objective here in my opinion. Real fun aswell.
You can make a demolition objective by adding the script “demolish”.
Then you parent a trigger object to the script, add the tag “demolish” to it
Now, you also parent a body to the script, this will be the objective body. Add the tag “target=custom” and then fill in anything as needed.

Now. This step is important, move up the trigger above the ground so its not too close to the ground or the game lags immensley. The next step is to make sure the body is at the correct altitude, the altitude the body is at is the altitude you need to get the target below.
Hack Target
First, add a script, then make it “hacktarget.lua”
Add a body and give it the tag “target=custom” And then parent a model to the body and give it the tag “hack” then optionally parent a light to it and give it to the tag “light”

“Wet Affair” Safes
You can make wet affair crates by adding “watersafe.lua” and parenting a body to the script, tag it “target=custom” Then just simply parent a vox to the body.
The safe will trigger even if it’s not raining. As long as it can see the sky it’ll trigger.

Part 3: Escape Vehicle and Helicopter
Escape Vehicle
The escape vehicle is how the player will escape the level. The escape vehicle consists of more pieces than any objective would
First, you must add the script, which is “escape.lua”. Then you must add a location, and tag it
escapecamera.
Now add a body also parented to the script, and tag it “escapevehicle” and “unbreakable”
And then a vox model parented to the body.
Parent another location to the vox model and tag it “arrow” This functions as the arrow above an escape vehicle.

Position the location above the escape vehicle or any space where the arrow should display when all targets are completed.


Helicopter
Now, before we begin. The helicopter is completely optional, you don’t need one but it sure as heck makes it more intense to rush to the escape.
First step is the script again, it is “alarmchopper.lua”
Now, you will need two locations to start off, both parented to the script. one tagged “start” and one “end”. This is the path the helicopter will follow and stop at when the timer reaches 20-10 seconds left.
Now you’ll need 4 Bodies, each respectively tagged
- chopper
- mainrotor
- tailrotor
- light
and as you’ve guessed, each body will just contain the vox file that represents each respective part. Leave light blank for now, since thats different than a vox file. For the chopper you’d add the body of the chopper and whatnot. Mainrotor is the main rotor, etc, etc.
Make sure every piece has collisions set to false, and that all pieces are also tagged “unbreakable”
Now, if your rotors are spinning oddly or wrong, make sure the actual vox is at pos 0,0,0. And only move the body when adjusting postions.
For the light, add a voxbox, make the size 2 2 2, disable its collisions. Make the PBR value 0 0 0 32 and tag it unbreakable
Now finally, parent a light to the voxbox, make its type cone, with a scale of 4000, angle of 30, reach of 100, unshadowed of 0.5 and a fogscale of 0.2. Now you just have to tag it “light” and position it accordingly to the voxbox.

Heres what my helicopter looked like ingame. (Lack of helicopter model i had to improvise)

NOTE: Dont forget to hide the helicopter under the map before it arrives so players cannot see it.
Part 4: Challenge Gamemodes
Challenge Script
The script that controls scoring and proper challenge stuff is called“challenge.lua” Youll be using it for all of these and is shown in all gamemodes below. But its important to know it has a param override you can do on it to change the music.
Simply type“music=marina.ogg” like you would do with the heist.lua.
You can replace marina.ogg with any song file found in “Teardown/Data/Music”
Mayhem Mode
Mayhem mode is the one where you gotta cause alot of mayhem, title in point.
You can recreate mayhem using a single script. its just that simple.
First step, add the script “challenge.lua” so the game can show the ending screen and such.
now, lets go over some Param values for you indecisive types!
The mayhem script has a few you can modify to your liking.
- star1, lets you change the amount of points required for the first star, the default value is “200000”. can be changed by typing star1=ANY NUMBER.YOU CAN DO THIS FOR EVERY STAR, just make sure it goes star2, star3, star4, star5. Default values are 400000, 600000, 800000 and 1000000 respectively
- grace, lets you change the voxel grace limit. How many can be destroyed before the alarm goes. Default is 1000, can be altered with grace=ANY NUMBER.Keep in mind this won’t change the text that shows up onscreen showing the limits. Theres currently no way to edit that because making a local version of the script will make it stop working.
Now, all you gotta do is add the script “challengemayhem.lua” Done! You can now play mayhem, dont forget to supply the player with explosives or something similar to help out.
Fetch Mode
Fetch is like heist mode but theres alot more objectives to do, vanilla fetch missions consist of alot of simple objectives. Other objectives will simply turn into simple objectives here.
Fetch can be added with the script “challengefetch.lua” Make sure you also have “challenge.lua”
Now all you have to do is add objectives, a helicopter, and an escape vehicle.IMPORTANT: Swap out the escape vehicles script to “challengeescape.lua” Make sure all the objectives are optional, this way players can plan out their fetch better.
Similar to mayhem mode, there are certain params you can change. this time its just star amounts.
- star1, star2, star3, star4, star5. Default values are 2, 4, 6, 8, 10. respectively
Hunted Mode
Ah, Hunted Mode. Good ole, Hunted Mode!
The gamemode where a heavily armed helicopter with blood lust chases you down while you collect objectives!
Hunted mode is the most advanced of the three, but dont let it discourage you.
You begin with your two scripts, “challenge.lua” and “challengehunted.lua”
Now, you need to a*semble the chopper, go to Part 3 of this guide, where i explain the helicopter, and follow along with that section doing what it says, but omit the two locations for a start and end point. And replace the script with “chasechopper.lua”
Now, we’ve got the helicopter and gamemode scripts, we need two final things. Locations for the objectives to spawn and a start script to signal the helicopter.
The script to start the helicopter isn’t included with the game, and has to be written by you!But don’t let that sentence frighten you, its litterally 3 lines long. (And i’ll be putting it here so its just a copy and paste)
So, go to your maps script folder (if you don’t have one, make one) and make a new text file called “start” Now open it up and paste this inside.
function tick()
******if InputPressed(“w”) or InputPressed(“a”) or InputPressed(“s”) or InputPressed(“d”) then
***********SetInt(“level.cleared”,2)
******end
end
NOTE: the asterisks are just filler because formatting sucks on a steam guide, remove all the asterisks if you’ve copy pasted the script.
Now go to Save as, change it to be all file types at the bottom. And change the txt extension to lua. Beautiful!
Now lets go back ingame. Add your “start” script. Then next would bethe location for chests to spawn. you can achieve this by parenting a location to the hunted script and giving it the tag “itemlocation” and now you can place as many as you want around the map, dont do too little or it will be unfun, and the script might break.
We also need to provide an actual objective to grab. So parent a body to the script aswell, and tag it “pickup” also give it, unbreakable, target, optional. Now simply parent a vox to the script, tag it “pickup” and you’re good to go, i do however recommend raising the vox up a few 5 voxels to prevent it from spawning in the ground.


Part 5: Closing Remarks
Hopefully, using this guide you can go and make some beautiful custom heists or challenge maps!
The map ive been making this entire guide will be posted below, you can open it up and check exactly how things work.
Happy Heisting!
https://steamcommunity.com/sharedfiles/filedetails/?id=2665209072 – [steamcommunity.com]


I hope you enjoy the Modding Encyclopedia: Heists and Challenge Modes – Teardown guide. This is all for now! If you have something to add to this guide or forget to add some information, please let us know via comment! We check each comment manually!
